Mac Mail (mail.app) setup
Launch Mac Mail by clicking the icon in your dock. If you don't have the Mail icon or cannot find it, do the following:
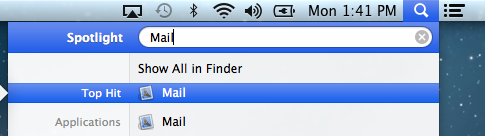
- Select the magnifying glass icon in the top right of your menu bar
- Type "mail"
- Select the Mail icon that comes up in the list under "Applications"
If you've never set up a mail account, jump to the next step. If you already have mail accounts, do the following:
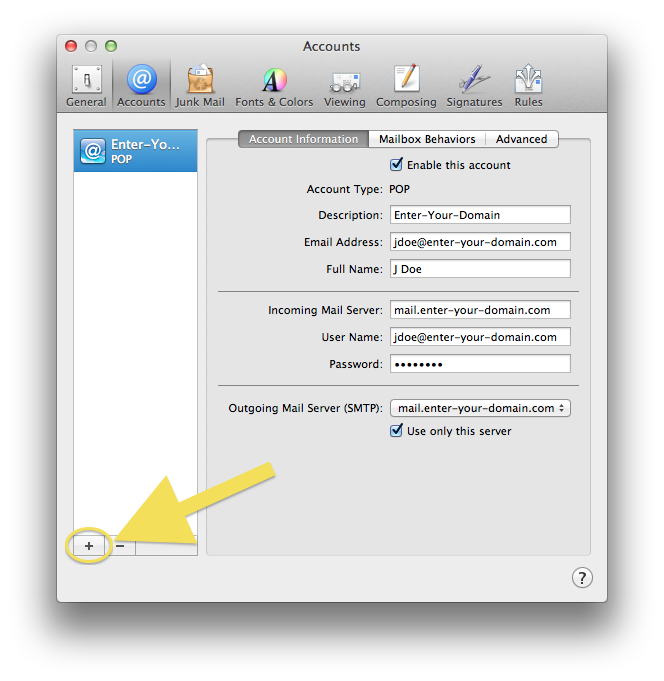
- Press command + comma (or select "Preferences" under the Mail menu) to open the preferences menu
- Click the "Accounts" icon near the top of the window that opens
- Click the plus sign in the bottom left of the Preferences window
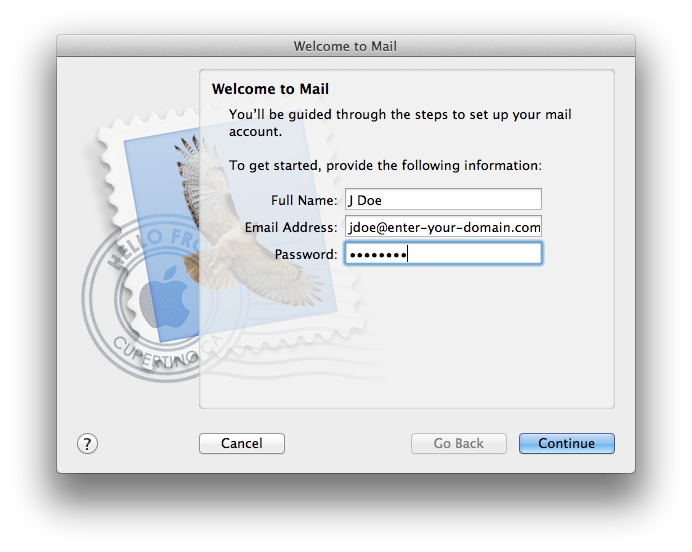
Next enter your mail account details:
- Full Name: Enter your name the way you want it to show up in your email from field.
- Email address: This is an email address you've configured in your control panel. It will always be in the form of "some_user@your_domain.com"
- Password: Your email address password. This is likely different from your hosting control panel password.
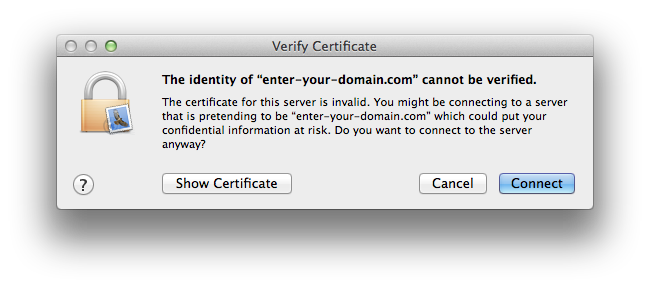
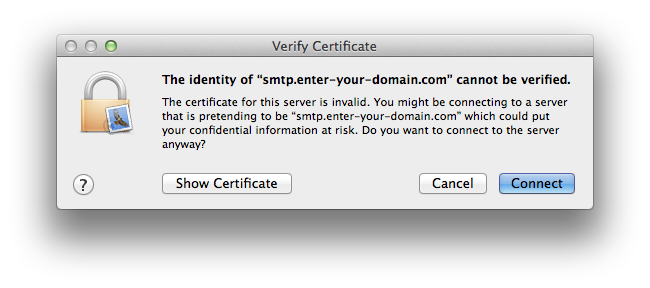
In most cases, you'll get the security warning screen shown below. In most cases you do not have your own private mail server with your own security certificate. Instead, you are using one of our mail servers. Our mail servers have a security certificate for "phpwebhosting.com". Your mail program warns you that the security certificate does not match your domain name. This is normal. It is possible (though expensive and usually unnecessary) to have your own mail server with your own certificate. Our sales department can set this up if you are interested. Again for nearly all uses you do not need to do this. The warnings are only shown during the setup of your mail account.
Press "Connect".
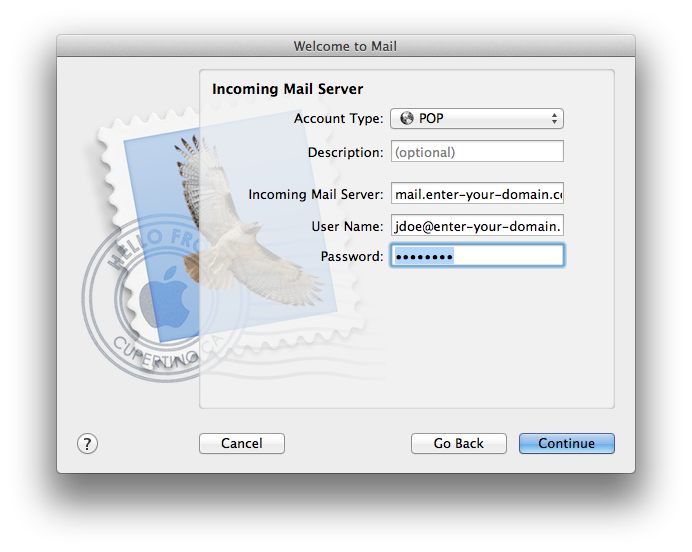
Next, configure the following options:
- Account Type: Select POP
- Description: Enter a description if you'd like. This can be left blank
- Incoming Mail Server: Set this to "mail.your-domain.com" (be sure to change "your-domain.com" to your actual domain name)
- User Name: Set this to your full email address - your_name@your-domain.com
- Password: Enter your email password
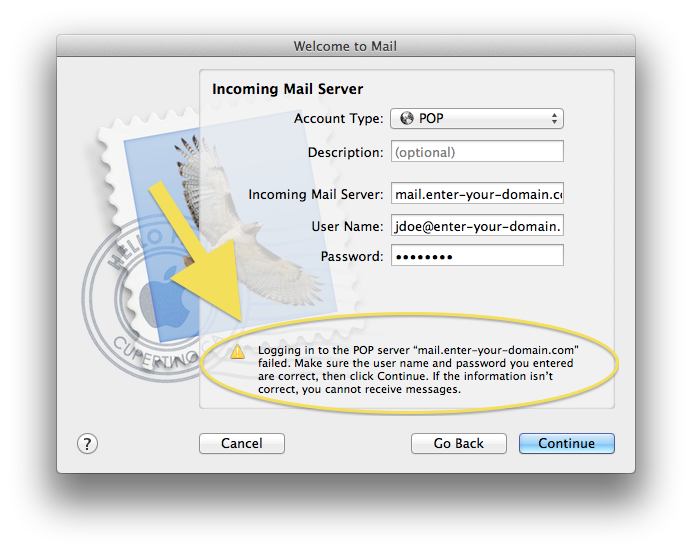
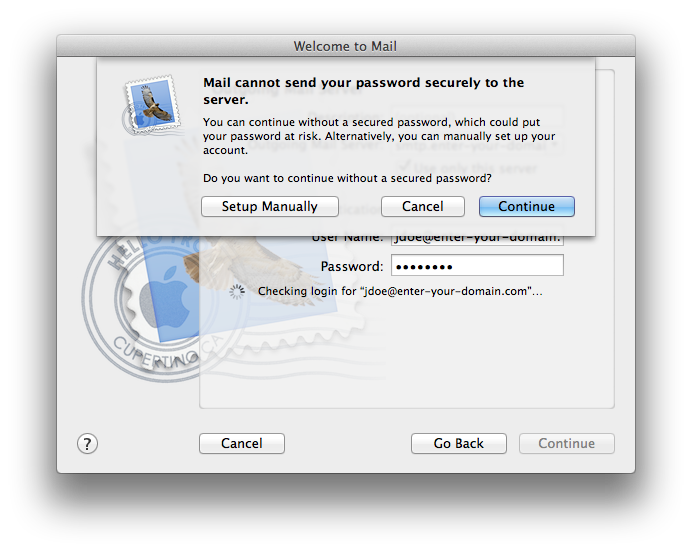
You may get a message which says login failed. If so, press the "Continue" button.
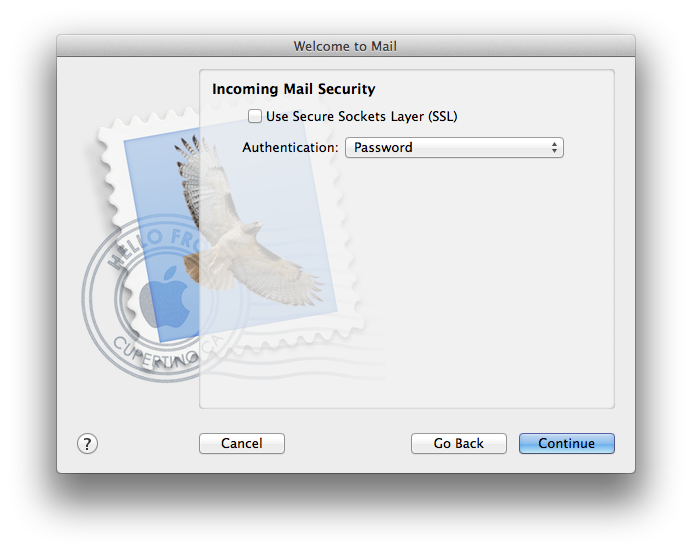
This screen may not be displayed - don't worry all is well. If you do see this screen, make sure "Use Secure Sockets Layer (SSL) is not checked. Set "Authentication" to "Password"
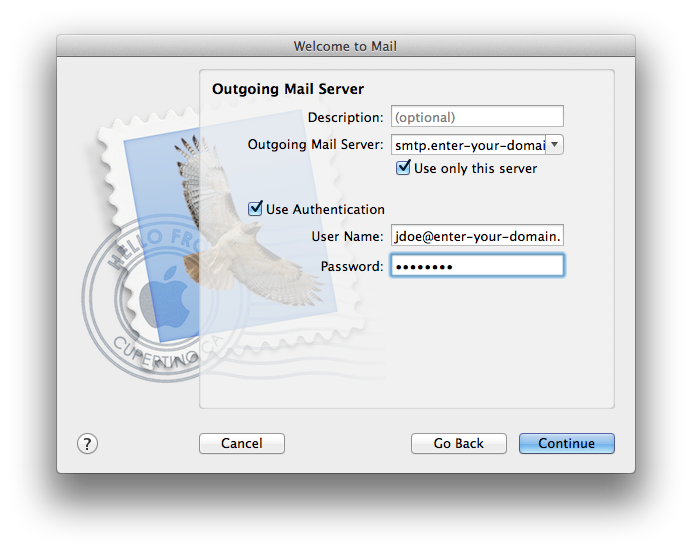
Configure the next screen as follows:
- Description: Leave blank or enter a description of your choice
- Outgoing mail server: Set this to "smtp.your-domain.com" (replace your-domain.com with your actual domain name).
- Some older account holdlers may need to use "mail.your-domain.com" instead of "smtp.your-domain.com"
- Make sure "Use Authentication" is checked.
- User Name: Enter your full email address
- Password: Enter your email password
It is possible (though expensive and usually unnecassary) to have your own mail server with your own certificate. Our sales department can set this up if you are interested. Again, for nearly all uses you do not need to do this. The warnings are only shown during the setup of your mail account.
Still not working?
Some versions of Apple Mail have a bug which causes mail accounts to go offline. Try the following fix :